[adapted from blog article http://www.wpbeginner.com/wp-tutorials/how-to-move-wordpress-to-a-new-host-or-server-with-no-downtime/]
To copy the live site to the local development XAMPP server, see this article.
Step 1. Create new account in Catalyst2 reseller space, using WHM control Panel.
Step 2. (a) Set up ftp account in WinSCP to access the new C2 account:
Host name: acai.active-ns.com
FTP – TLS/SSL Explicit encryption
Username and password from WHM account setup
Remote directory: /public_html
(b). Install plugin Duplicator in the live site.
(c) Once you have installed and activated Duplicator, go to the Duplicator » Packages section in your WordPress admin area.
Next, you need to click the Create New button in the top right corner.
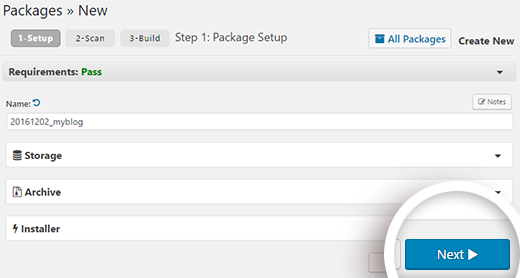
After that, click the Next button and follow the steps to create your package.
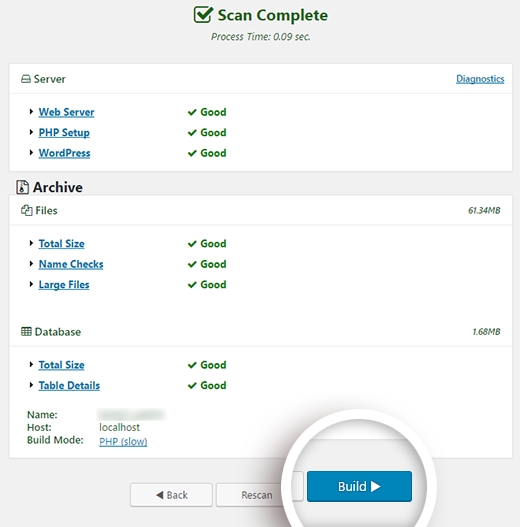
Make sure that your scan results check out (everything should say “Good”), and then click the Build button. The process may take several minutes to complete, so leave the tab open as it works.
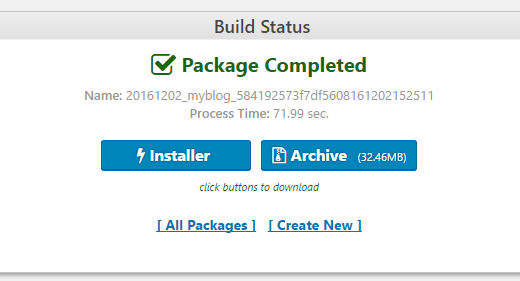
Once the process is complete, you need to click on both the Installer and then the Archive buttons to download the package. You will need both files.

The archive file is a copy of your site, and the installer file will automate the installation process for you.
Step 3: Import Your WordPress Site to Your New Host
Now that you have downloaded both the archive and installer files, the next step is to upload them to your new web host.
You can do this by connecting to your new web host using FTP. If you’ve never done this before, check out our beginner’s guide to uploading files via FTP to WordPress.
Note: When setting up your FTP client to connect to your new web host, keep in mind that your domain name still points to your old web host. That means you’ll need to enter the IP address of your new host instead of your domain. This is to ensure that these files go to the new host rather than the old host.
With Catalyst2 account:
Use WinSCP as in Step 2, above, to FTP to public_html folder in new account.
Using your FTP client, upload both installer.php file and your archive .zip file to the root directory of your website. This is usually /username/public_html/or /username/public_html/example.com where example.com is your domain name.
If you’re not sure, just ask your web hosting company.
Make sure that your root directory is completely empty. If you have WordPress installed in your root directory, then you need to delete WordPress first.
Step 4: Create a temporay URL using https://hosts.cx/ to work with until the domain is switched over
Once you’ve uploaded both files to your new host, you need to access the installer.php file in a browser.
The file can be accessed using a URL like this:
http://www.example.com/installer.php
However, the problem is this URL will take you to your old web host, and you will get a 404 error. This is because your domain name is still pointing to your old web host.
Normally, folks will tell you to change your domain nameservers and point to your new host. However, that will result in your users seeing a broken website as you migrate it.
We’ll show you how you can access your new site temporarily on your computer, without affecting your old site.
This is done with a temporary URL.
Go to https://hosts.cx/ and enter the IP address of the site, 84.18.207.55
and the domain, eg chrisgranger.co.uk and click the button to get the temporary URL, for example, http://fuis4.hosts.cx/
Making these changes will allow you to access the files on your new host using the temporary URL, while the rest of the world will still be accessing your site from the old host. This ensures 100% uptime.
The first thing you need to do is find the IP address of your new web hosting server. To find this, you need to log into your WHM dashboard and look at the list of accounts. The IP address, 84.18.207.55, is listed next to each account.
Create a database on your new host
To create a database in cPanel, click the link to MySQL Databases:

Click Create Database, add ‘wp’ next to the username for the 2 boxes to name the database and the user name. Generate a password and finish. Be sure to make note of the database name, username and password.
Step 5: Begin the Duplicator Migration Process
Now we’re ready to run the installer. Navigate to this address in your browser window, replacing example.com with your temporary URL:
http://www.example.com/installer.php becomes http://fuis4.hosts.cx/installer.php
Once you have created the database (see above), you will need to enter the database information in the fields below and then click on the Test Connection button.
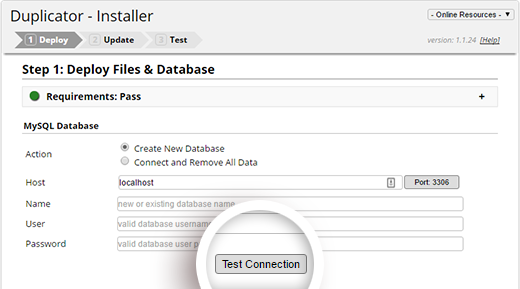
If the installer fails to connect to your database, then check the values you entered above and make sure they are correct.
Once you have successfully connected to your database, scroll down to read the warnings and notices and check the box confirming you’ve read them. Then click the Run Deployment button.

The installer will now import your database. The process may take several minutes, so keep the tab open as it works.
In step 2 of the installer, you’ll be asked to verify your old and new URL paths. Make sure it’s accurate and click Run Update to update your URLs. It may be that this is when you can replace the temporary URL with the real domain name – otherwise, leave it, and change this in Setting/General in the WP dashboard after it is installed.
In the final step, you can complete the process and verify that everything is working correctly by clicking the buttons in order.
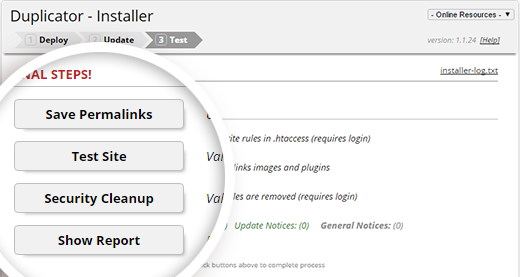
Important: Check the links to other pages all work in the temporary site. If they don’t, go to Setting/General in the dashboard and replace the temporary URL and email withe the read domain. Check the pages now load in the temporary site.
Step 6: Update Your Domain
At this point, you’ve created a complete copy of your WordPress database and files on your new hosting server. But your domain still points to your old web hosting account.
To update your domain, you need to switch your DNS nameservers. This ensures that your users are taken to the new location of your website when they type your domain into their browsers.
If you used a domain registrar like Namecheap, then you need to update your nameservers.
You will need the nameserver information from your new web host (Catalyst2). This is usually a couple of URLs that look like this:
ns5.catalyst2.net
ns6.catalyst2.net
For the sake of this guide, we will be showing you how to change DNS nameservers with Namecheap.
First you need to login to your Namecheap account and then click on the button next to domains, to get a listing. Next to the domain, click the ‘Manage’ button:
Look for the Custom DNS section:

A tick and a cross appear to the right of the nameservers – click the tick to save the new settings.
You have successfully changed the nameservers. DNS changes can take 4 – 48 hours to propagate for all users.
Now since you have the same content on your old host and the new host, your users wouldn’t see any difference. Your WordPress migration will be seamless with absolutely no downtime.
If there are email addresses for the domain, also set up the new email accounts withing cPanel.
To be on the safe side, you can wait to cancel your old hosting account until 7 days after your migration.
